
Configuring PTZ settings
The camera's view can be panned (left/right), tilted (up/down), and zoomed. A PTZ preset saves a specific camera position, enabling quick monitoring of key areas when an event occurs. Additionally, 2 or more presets can be grouped to create a tour that cycles through major areas at set intervals.
To configure PTZ settings
- Click Settings > Devices.
- On the Device settings page, select the camera from the device list.
- In the Device settings panel, click the PTZ tab.
- Set PTZ presets and groups.
- When finished, click Apply.
PTZ preset settings
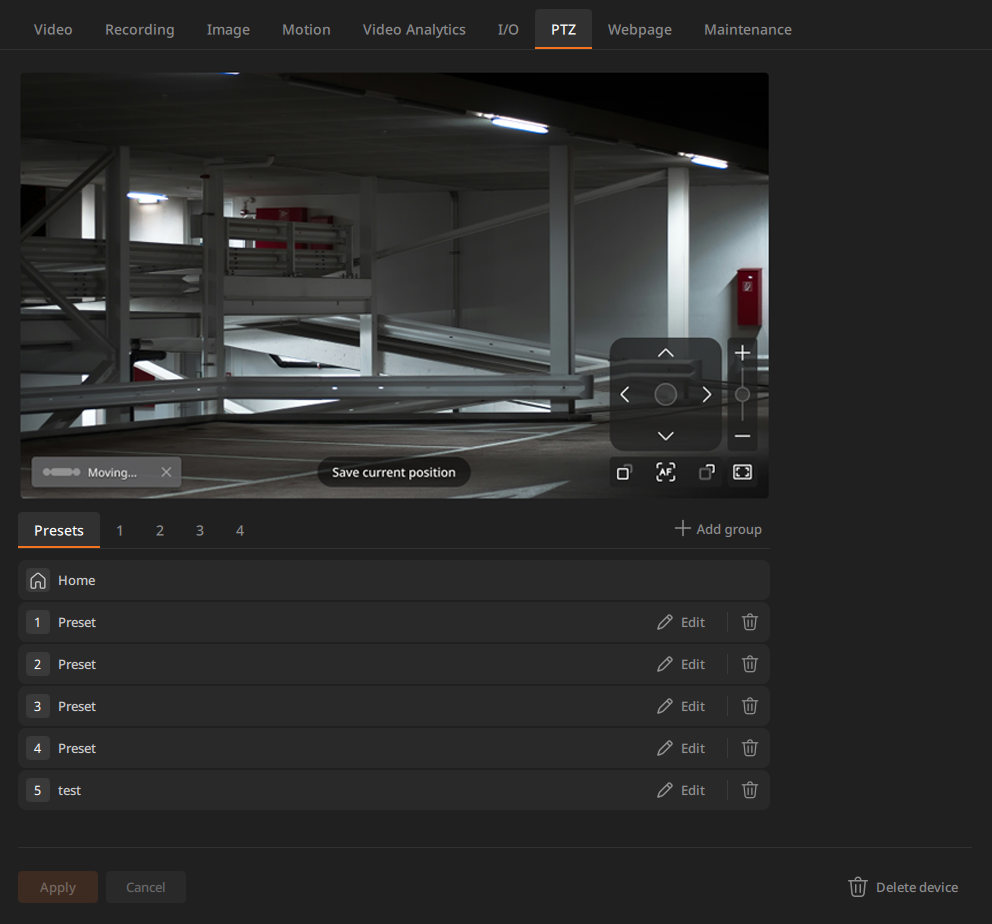
Adding a preset
- The maximum number of presets depends on the device specifications.
- For cameras that do not support presets, the Save current position button will not be displayed.
- Under the PTZ tab, click the Presets tab below the video.
- On the preview screen, set the desired position.
- Drag on the preview to zoom in, or click the preview to move to the desired position.
- Use the pan/tilt joystick to set the view position.
- Click
 or
or  or drag the zoom control bar to zoom in or out.
 - Click the AF
 to focus near, or click
  to focus far.
- Click Save current position to save the PTZ position as a preset.
- In the Preset dialog, choose a number and enter a name.
- Home: If supported, save the current position as Home. The Home option appears in the Save as drop-down menu when available.
- If you select an existing preset number when adding a new preset, the existing preset is replaced by the new one.
- To display a preset button on the image, select Show button on device view. Click the button to jump to the preset.
- Click Save.
To modify a preset
Modify a preset from the preset list at the bottom of the Presets tab.
- In the preset list, click Edit for the preset you want to modify.
- Change the settings in the Preset dialog.
- Click Save.
To delete a preset
In the preset list, click  to delete the selected preset.
Group settings
- Click Start group in the Group section to start the tour. The tour runs through the presets in the group at the set interval until you click Stop.
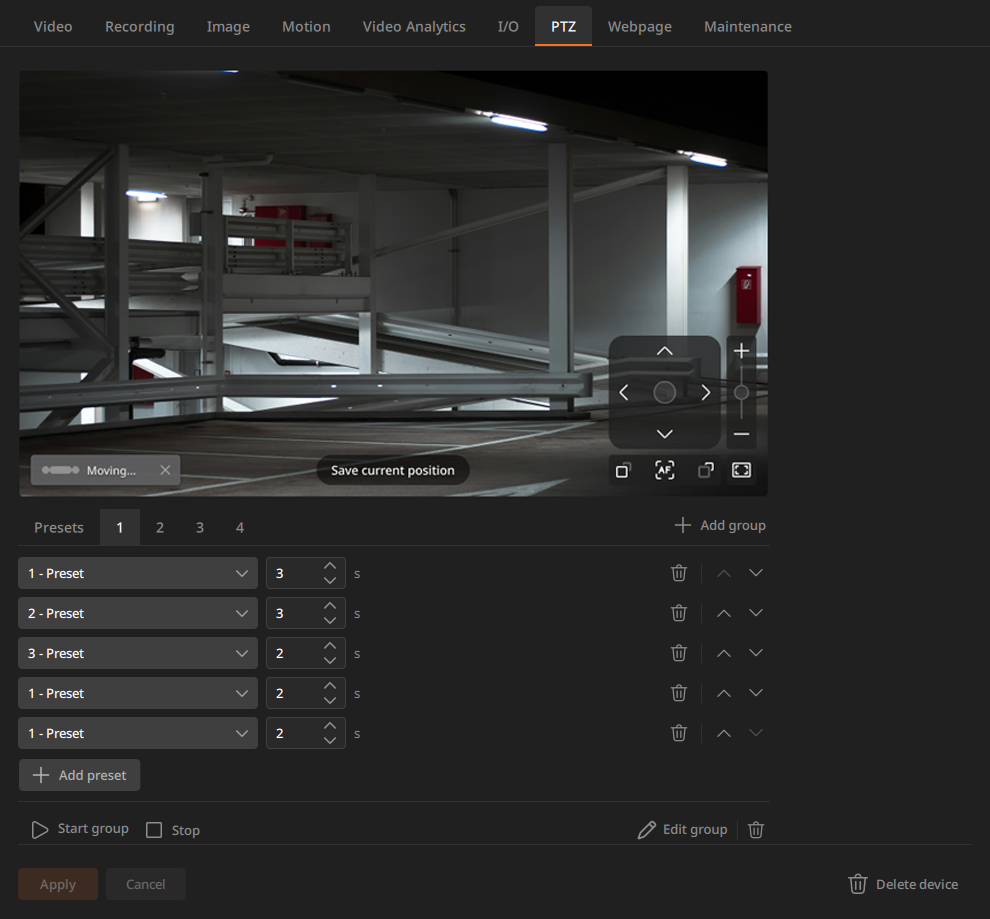
Adding presets to a group
- Under the PTZ tab, click Add group.
- In the Add group dialog, enter a group name and click Add group.
- Under the new group tab, click Add preset to add presets and set the interval.
- The default interval is 10 seconds. Set the interval within the range 1–100 seconds (the supported range may vary by device).
- Change the order of group presets by clicking
 to move up and
  to move down.
 - To delete a group, click .
- Click Apply.
To edit a group preset
Added groups appear in the list at the bottom of the Group tab. Change the order or interval of presets in a group.
- Click or to the right of the group to change the order. Clicking moves the item up and clicking moves it down.
- Click or on the interval to change it.
- Click Apply.
To delete a group preset
In the group, click to delete the selected preset, then click Apply.
To rename a group
At the bottom-right of the Group tab, click Edit group. In the Edit group dialog, change the name and click OK.
To delete a group
At the bottom-right of the Group tab, click . In the Delete group confirmation dialog, click Delete.