Creating a map
Place various devices on the map.
Note: Administrator role is required to create a map.
To create a map
- On the Home page, click View.
- Click
 button on the Tab bar to open the New
Layout tab.
button on the Tab bar to open the New
Layout tab.
- Click
- Click Maps on the View tab navigation bar.
- Click button at the bottom left of the Maps panel, then
select Add map from the shortcut menu.
- In the New Map tab appearing, click Add
background to add a map.
- The image formats that can be added as map images are .jpg, .png, and .bmp files.
- To change the added image, click Change background.
- Set the background color behind the map image.
- Choose a color using the color picker or input a color value.
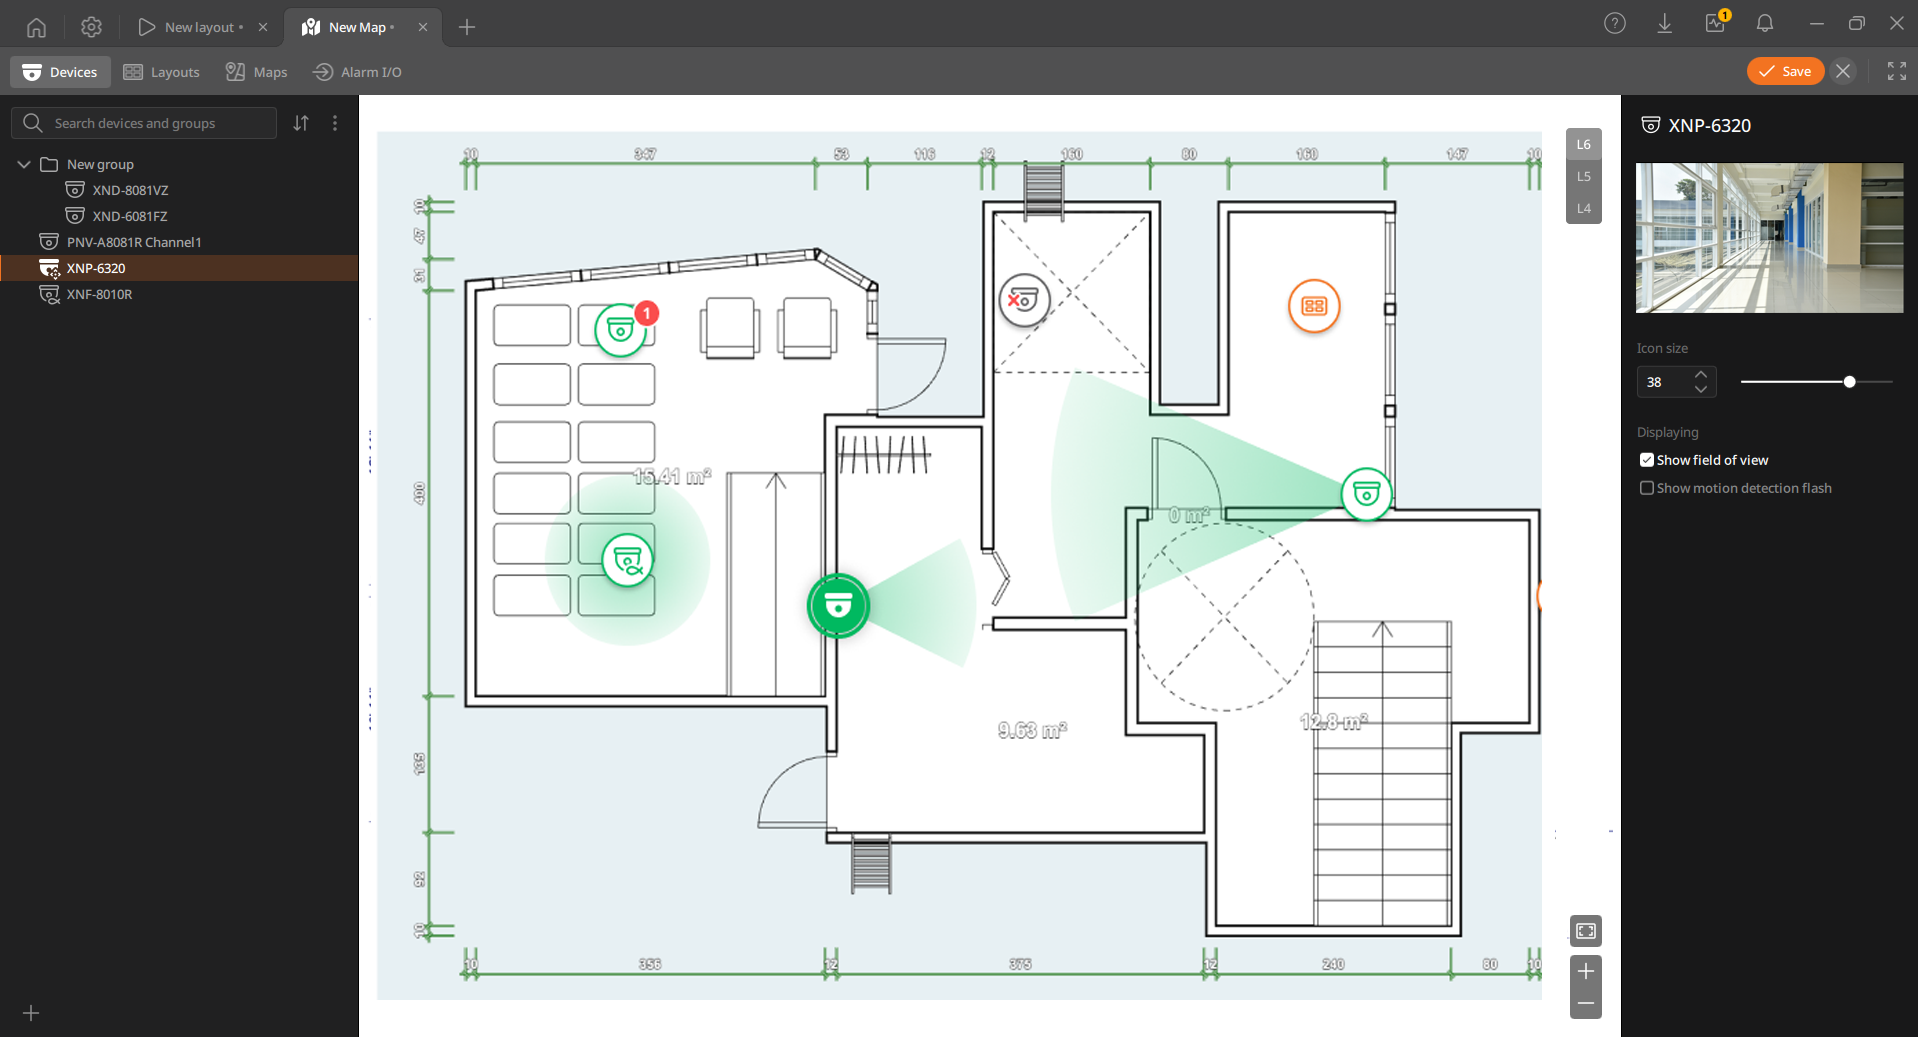
- Click Devices on the navigation bar, then drag the desired device from the Devices panel to the target position.
- The added devices are indicated by a green icon.
- When a device is selected, the Info panel appears. The device's video can be viewed, and detailed display options such as icon size, direction arrow, and the field of view (FOV) can be configured. The available settings may vary depending on the device specifications.
- Icon size: Set the size of the device icons to be displayed on the map.
- Show field of view: After placing the device, set the angle and radius of the field of view (FOV). Directly adjust the angle and radius by moving the device's arrow and fan-shaped indicator.
- Show motion detection flash: When motion is detected, the device icon blinks green.
- Click Layouts on the View tab navigation bar, then drag the desired item in the Layouts panel to the target position.
- The added layout will be indicated by an orange icon.
- When a layout is selected, the Info panel appears on the right. The layout image can be viewed, and detailed display options for the layout icon shown on the map can be configured.
- Icon size: Set the size of the layout icons displayed on the map.
- Click Maps on the View tab navigation bar and drag the desired map in the Maps panel to the desired position.
- The added map will be indicated by an orange icon.
- When a map is selected, the Info panel appears. The map can be viewed, and detailed options for the map icon can be configured. The available settings may vary depending on the device specifications.
- Icon size: Set the size of the map icons to be displayed on the map.
- Click Save.