
Configuring fisheye settings
BLAZE processes images from fisheye cameras to allow monitoring without distortion.
Note: The Fisheye feature is only available on fisheye cameras.
To configure fisheye settings
- Click Settings > Devices.
- In the Device settings page, select the desired device from the list of devices.
- Click the Fisheye tab.
- Configure the detailed settings.
- After completing the settings, click Apply.
Fisheye dewarping settings
- Toggle Fisheye dewarping to On to use the fisheye feature. The setting options will not be displayed if Fisheye dewarping is not activated.
- In the image, zoom in or out and change the position left or right.
- The image is displayed in a circular view by default. Scroll the mouse to zoom in to see a rectangular view dewarped according to the settings for the Mount, Image rotation, and RPL number options.
- When you zoom in on the image, you’ll see a mini view next to it. Drag the view to the desired direction to rotate the image.
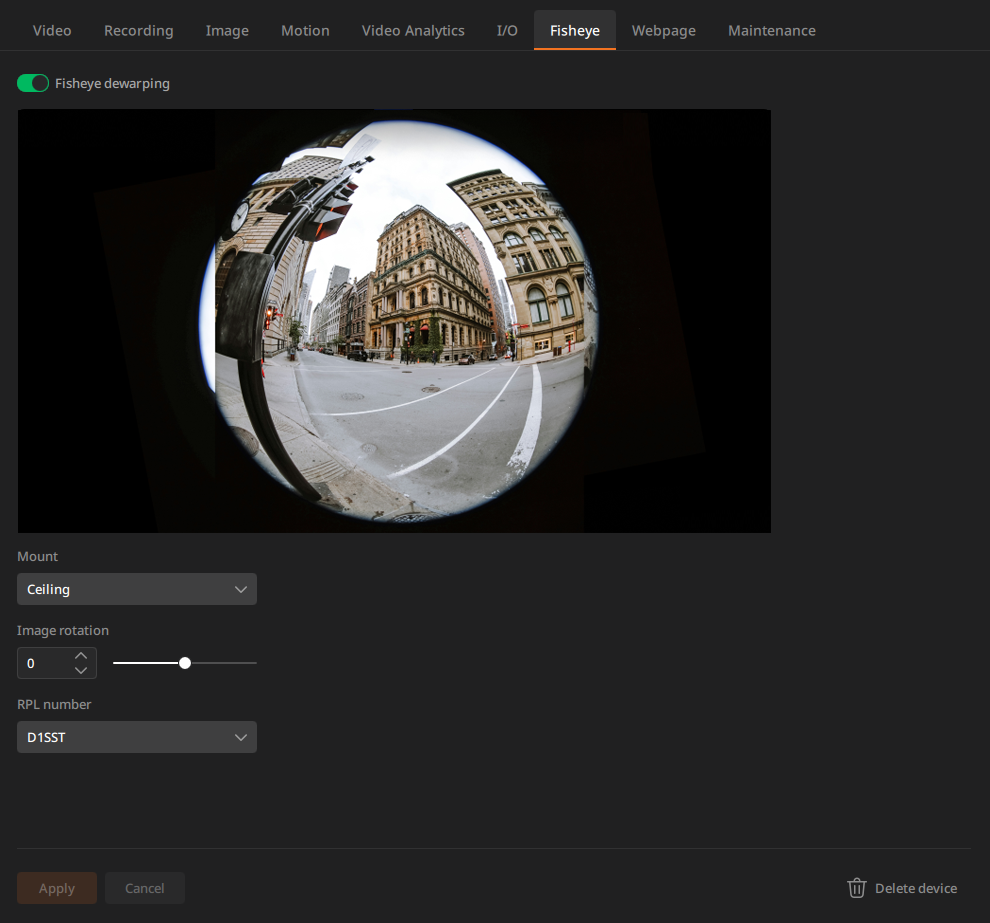
- Mount: Select the installation position of the camera. The distorted image will be corrected and displayed according to the selected position.
- Ceiling: Camera installed on the ceiling
- Wall: Camera installed on the wall
- Ground: Camera installed on the ground
- Image rotation: Rotate the video to the desired orientation for monitoring. The video can be rotated vertically or horizontally, with a setting range of -180 to 180 degrees.
- RPL number: Set the lens code required for dewarping. The lens codes currently supported by the camera are displayed by default.